# java-webapp-foundation
**Repository Path**: pandaNAhack/java-webapp-foundation
## Basic Information
- **Project Name**: java-webapp-foundation
- **Description**: No description available
- **Primary Language**: Unknown
- **License**: Apache-2.0
- **Default Branch**: master
- **Homepage**: None
- **GVP Project**: No
## Statistics
- **Stars**: 0
- **Forks**: 0
- **Created**: 2025-11-06
- **Last Updated**: 2025-12-04
## Categories & Tags
**Categories**: Uncategorized
**Tags**: None
## README
# Overview
### "java-webapp-foundation" is an example project of java micro web app.
### test time 2025-11-13:16.00
- You do not need to remember rules and notations of jsp/servlet.
- The behavior that we often use in web applications has already been coded.
- Just clone it and modify it and test it.
### Tutorials Below
- Hands on with Eclipse and Tomcat
It is licensed under [Apache 2.0 license](https://www.apache.org/licenses/LICENSE-2.0).
### About this example web app.
- "Clone and Go" web app.
- You can make a web application just modifying this web application project.
 - Supports Web API(REST API)
 # Tutorial
## Step by step tutorial with Eclipse.
___
# Step 1. How to import(clone) web app project.
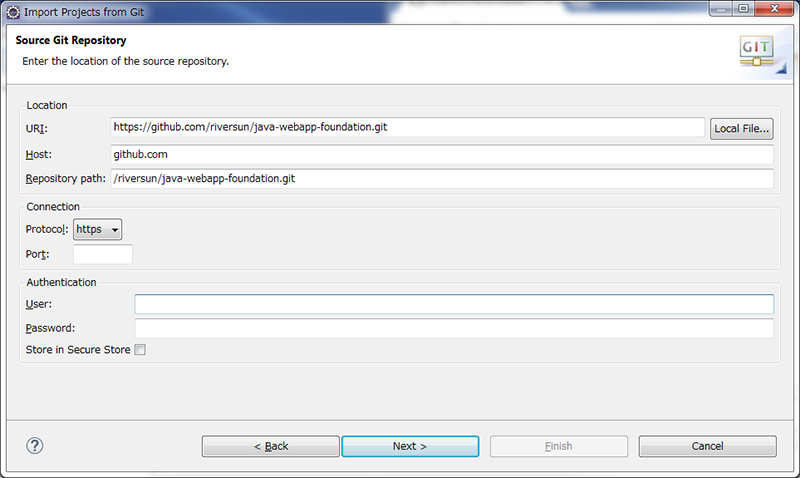
### 1-1.Import project from Github
- File>Import>Git>Project from git
- paste url https://github.com/riversun/java-webapp-foundation.git
# Tutorial
## Step by step tutorial with Eclipse.
___
# Step 1. How to import(clone) web app project.
### 1-1.Import project from Github
- File>Import>Git>Project from git
- paste url https://github.com/riversun/java-webapp-foundation.git
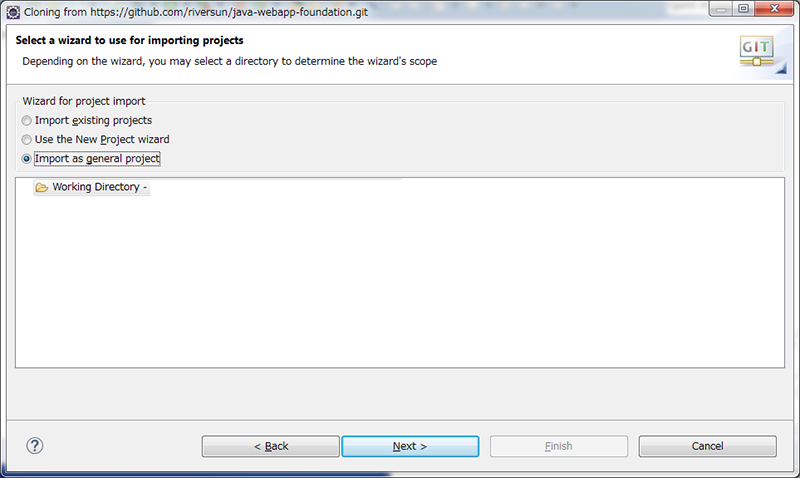
 ### 1-2. Import as general project
- Select "Import as general project"
- Click Next
### 1-2. Import as general project
- Select "Import as general project"
- Click Next
 ### 1-3. Import finished
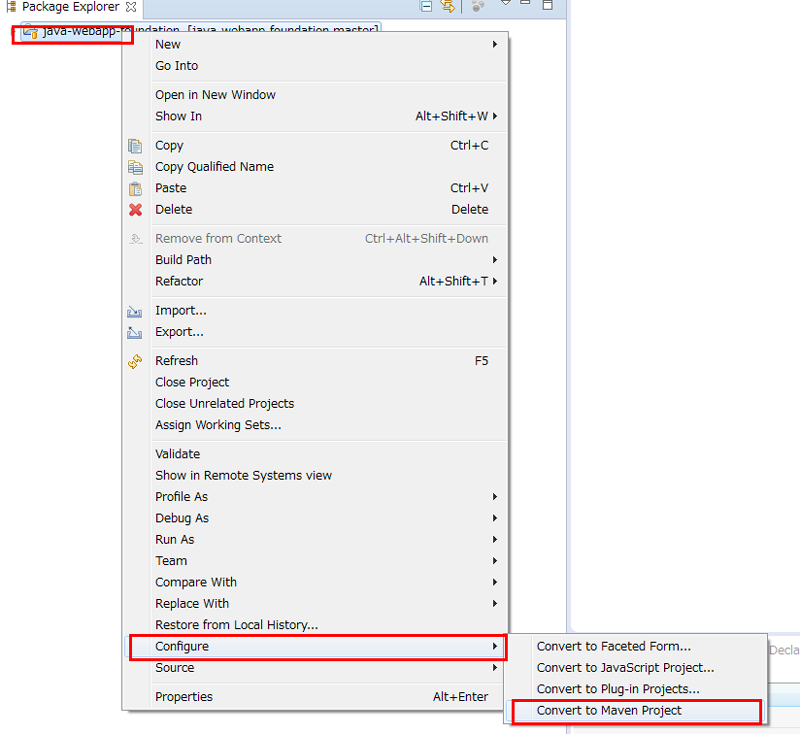
 ### 1-4. Convert to maven project
- Right click on the project to open context menu
- Click Configure>Convert to maven project
### 1-4. Convert to maven project
- Right click on the project to open context menu
- Click Configure>Convert to maven project
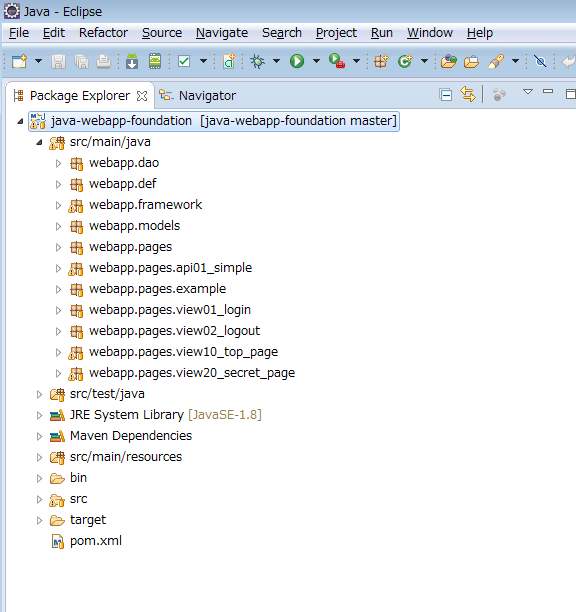
 ### 1-5. The imported project is converted to maven project like this.
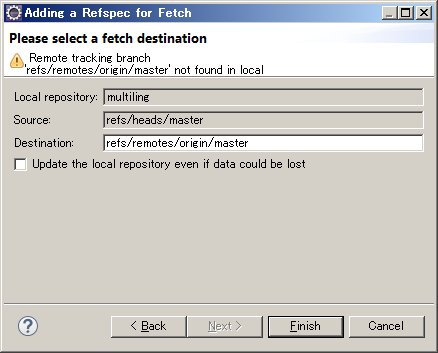
 ### Error Handling Case: Pull failed on Eclipse
- Configure Fetch at the GIT perspective
- Apply "refs/heads/master" in the Source
- Apply "refs/remotes/origin/master" in the Destination(Maybe set automatically)
### Error Handling Case: Pull failed on Eclipse
- Configure Fetch at the GIT perspective
- Apply "refs/heads/master" in the Source
- Apply "refs/remotes/origin/master" in the Destination(Maybe set automatically)
 Or this,
- Source:"+refs/heads/*"
- Destination "refs/remotes/origin/*"
___
# Step 2. Add server to Eclipse
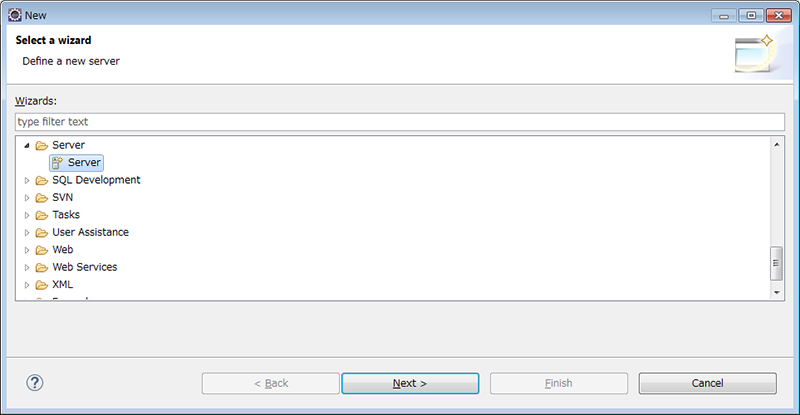
### 2-1. Open server window
- File>New>Other>Server
Or this,
- Source:"+refs/heads/*"
- Destination "refs/remotes/origin/*"
___
# Step 2. Add server to Eclipse
### 2-1. Open server window
- File>New>Other>Server
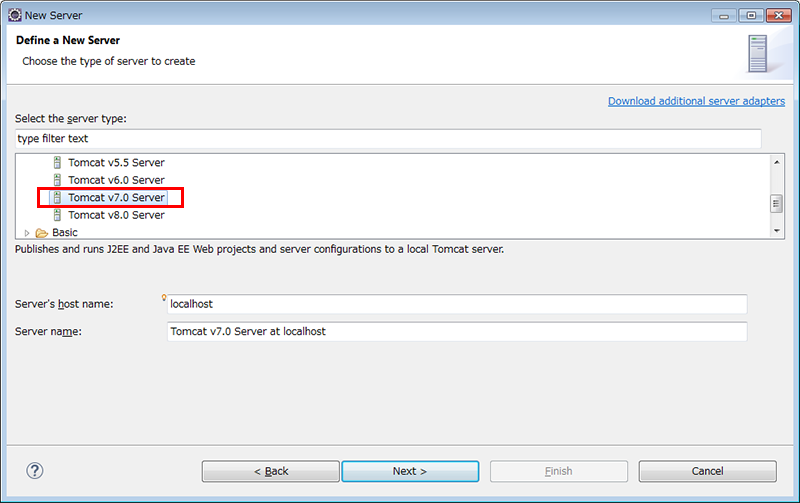
 ### 2-2. Define a New Server
- In this example, select Tomcat v7.0 server.
- (You can select another server taht supports servlet 3.0 or higher)
### 2-2. Define a New Server
- In this example, select Tomcat v7.0 server.
- (You can select another server taht supports servlet 3.0 or higher)
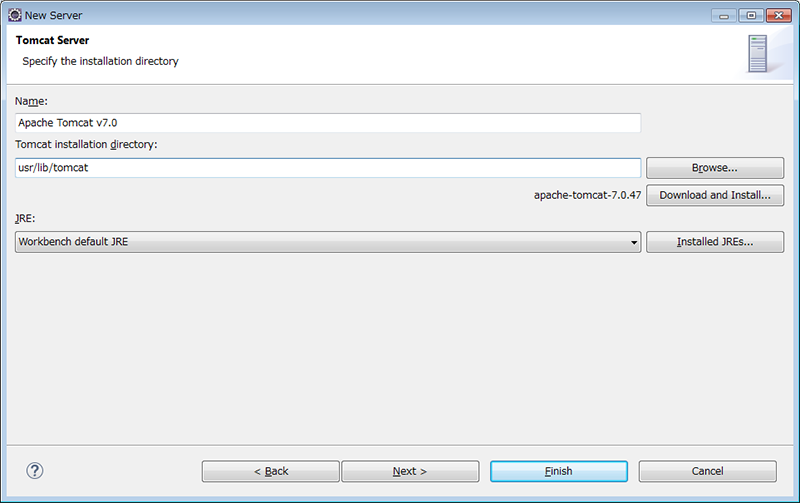
 ### Error Handling Case1. If “Unknown version of tomcat was specified” is shown on this window,
- Make sure if tomcat is unzipped in specified directory.
- Check whether unzip has failed.
- Eclipse is checking following files in the tomcat directory.
```
conf/catalina.policy
conf/server.xml
conf/web.xml
conf/context.xml
conf/tomcat-users.xml
conf/catalina.policy
conf/catalina.properties
lib/catalina.jar
```
### Error Handling Case1. If “Unknown version of tomcat was specified” is shown on this window,
- Make sure if tomcat is unzipped in specified directory.
- Check whether unzip has failed.
- Eclipse is checking following files in the tomcat directory.
```
conf/catalina.policy
conf/server.xml
conf/web.xml
conf/context.xml
conf/tomcat-users.xml
conf/catalina.policy
conf/catalina.properties
lib/catalina.jar
```
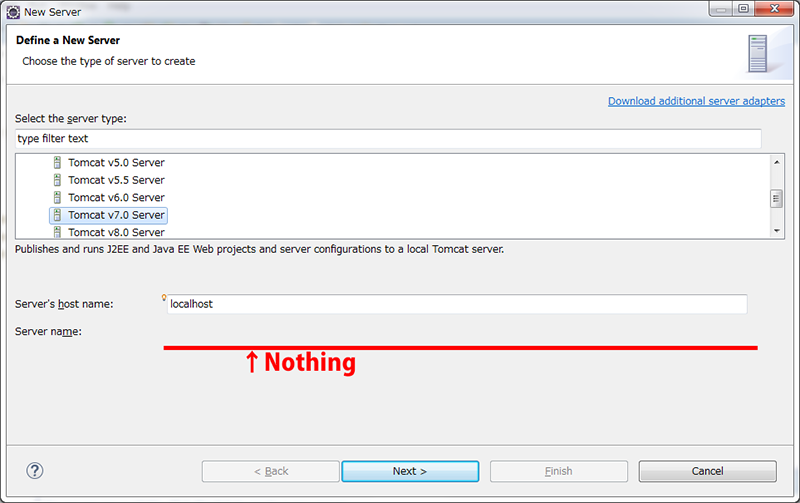
 ### Error Handling Case2. If you erase tomcat from “Servers”, nothing is displayed here,and you may not be able to select Tomcat.
- In that case,try following steps.
```
1.Close Eclipse
2.Open [workspace]/.metadata/.plugins/org.eclipse.core.runtime/.settings
3.delete files below.
org.eclipse.wst.server.core.prefs
org.eclipse.jst.server.tomcat.core.prefs
4.Restart Eclipse
```
### Error Handling Case2. If you erase tomcat from “Servers”, nothing is displayed here,and you may not be able to select Tomcat.
- In that case,try following steps.
```
1.Close Eclipse
2.Open [workspace]/.metadata/.plugins/org.eclipse.core.runtime/.settings
3.delete files below.
org.eclipse.wst.server.core.prefs
org.eclipse.jst.server.tomcat.core.prefs
4.Restart Eclipse
```
 ___
# Step 3. Show server view on Eclipse
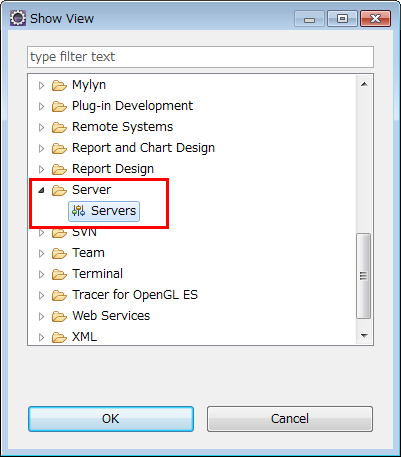
### 3-1. Show "Servers" tab
- Window>Show View>Other>Server
- select "Servers"
___
# Step 3. Show server view on Eclipse
### 3-1. Show "Servers" tab
- Window>Show View>Other>Server
- select "Servers"
 ### 3-2. "Sever" tab is added like this.
 ___
# Step 4. Run web app on the Tomcat
### 4-1. Add this app to the Tomcat
- Right click on the project to show the context menu.
- Run As > Run on Server
- Click "Finish" button.
___
# Step 4. Run web app on the Tomcat
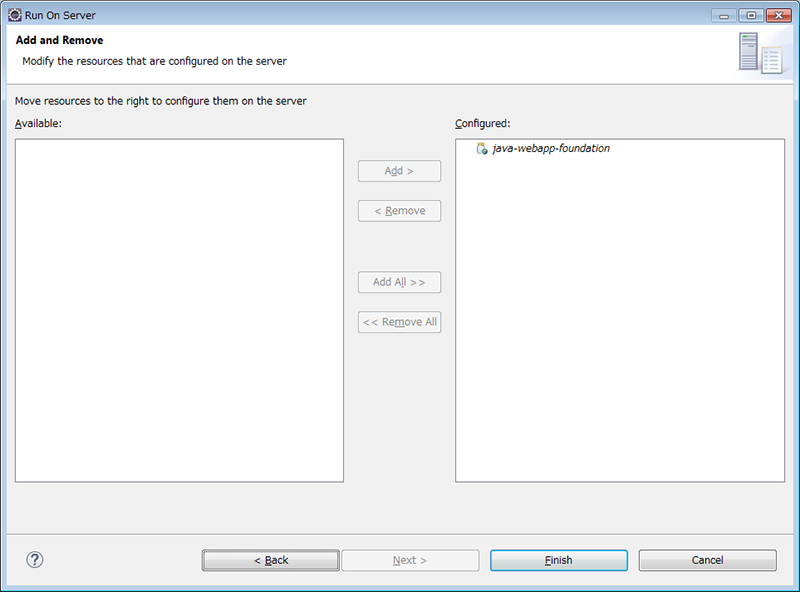
### 4-1. Add this app to the Tomcat
- Right click on the project to show the context menu.
- Run As > Run on Server
- Click "Finish" button.
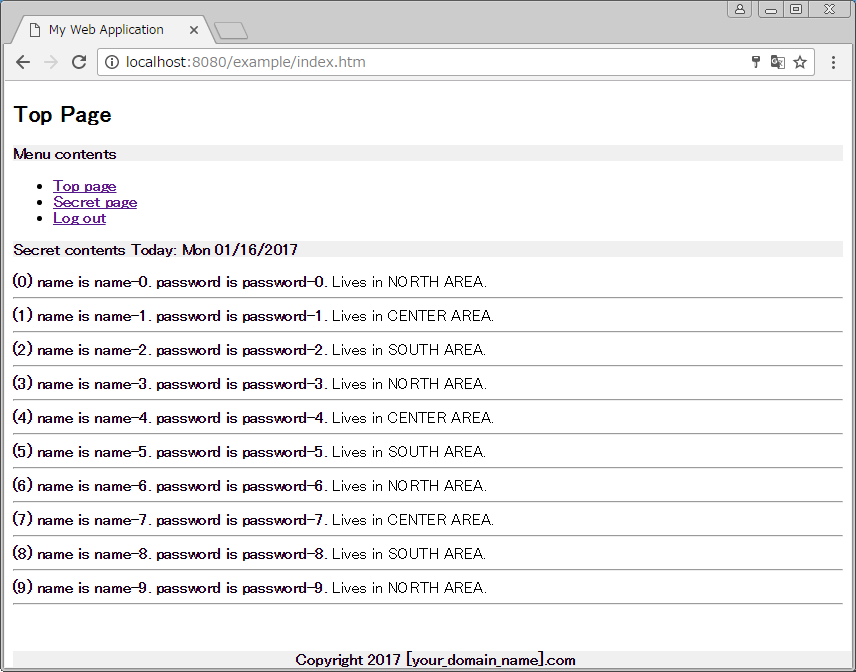
 ### 4-2. Web App installed on the Tomcat
- Typically,access http://localhost:8080/example/ with your browser.
- Example app's top page will be shown just like below.
- Notice that the password field is filled with stars as it has not been logged in yet
- Click "Log In"
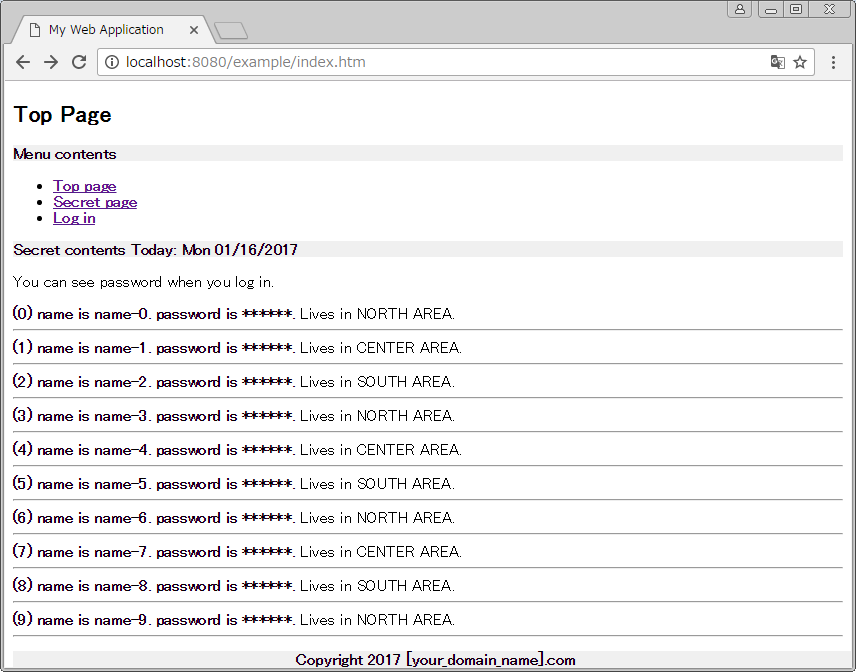
### 4-2. Web App installed on the Tomcat
- Typically,access http://localhost:8080/example/ with your browser.
- Example app's top page will be shown just like below.
- Notice that the password field is filled with stars as it has not been logged in yet
- Click "Log In"
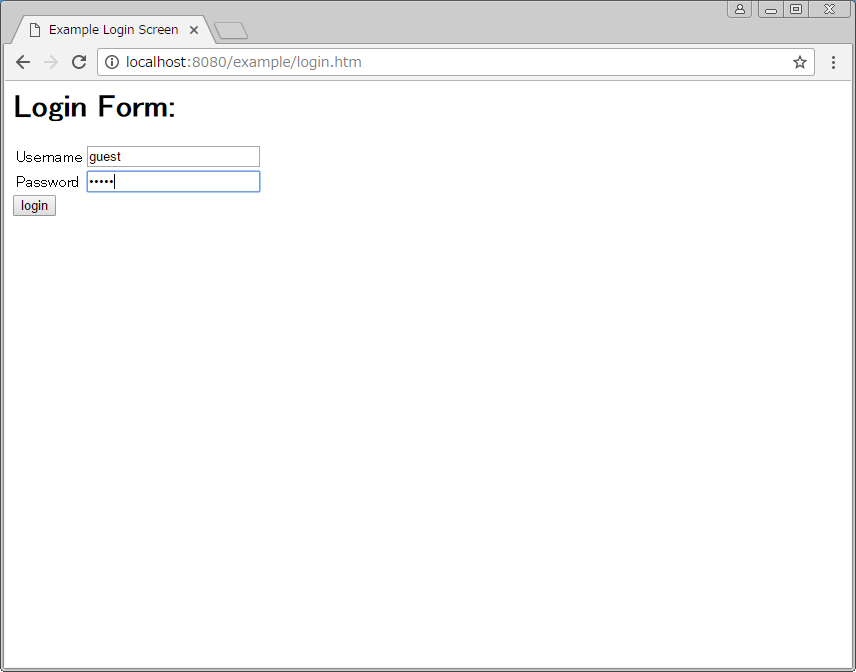
 ### 4-3. Log in page will be shown.
- Enter "guest" in the Username field to login.
- Enter "guest" in the Password field to login.
### 4-3. Log in page will be shown.
- Enter "guest" in the Username field to login.
- Enter "guest" in the Password field to login.
 ### 4-4. Log in finished.
- You can see the password of listed names.
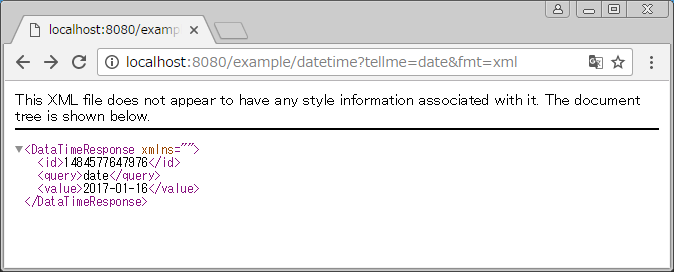
### 4-5. Easy to implement REST API
- Returns results as XML
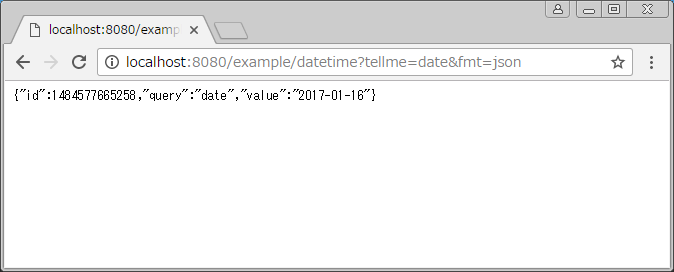
- Returns results as JSON
___
# Appendix
## Appendix 1. How to change URL
### APDX 1-1.Remove web app project from Tomcat
- Right click on the web-app-project on the Servers view.
- Select "Remove"
### 4-4. Log in finished.
- You can see the password of listed names.
### 4-5. Easy to implement REST API
- Returns results as XML
- Returns results as JSON
___
# Appendix
## Appendix 1. How to change URL
### APDX 1-1.Remove web app project from Tomcat
- Right click on the web-app-project on the Servers view.
- Select "Remove"
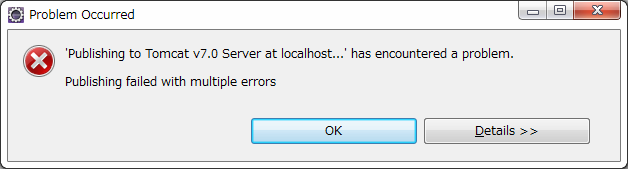
 ### APDX 1-2. Click "OK"
- If this dialog is shown, click "OK".
### APDX 1-2. Click "OK"
- If this dialog is shown, click "OK".
 ### APDX 1-3. Clean Tomcat
- Right click on the Tomcat instance in the Servers view.
- Click "Clean" on the context menu.
### APDX 1-3. Clean Tomcat
- Right click on the Tomcat instance in the Servers view.
- Click "Clean" on the context menu.
 ### APDX 1-4. Click "OK"
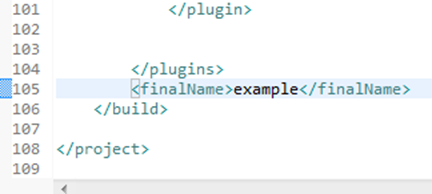
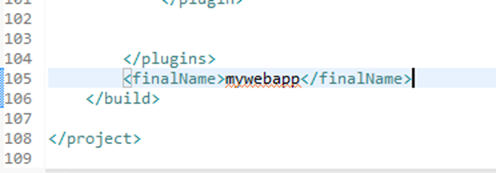
 ### APDX 1-5. Change url.
- Open POM.xml
- Edit <finalName> value
- Change "example" to "mywebapp"
### APDX 1-5. Change url.
- Open POM.xml
- Edit <finalName> value
- Change "example" to "mywebapp"
 ↓↓↓
↓↓↓
 ### APDX 1-6. Update maven project
- Right click on the web-app-project.
- Select "Maven">"Update Project"
### APDX 1-6. Update maven project
- Right click on the web-app-project.
- Select "Maven">"Update Project"
